 KES
 NGN - Nigeria
 ZAR - South Africa
 USD - International

Geeklog is a lightweight, open-source content management system and blog engine. It includes user accounts, comments, polls, calendars and a plugin system, and it runs comfortably on modest hosting. You can install it in a few minutes with Softaculous in cPanel.
When Geeklog makes sense
Geeklog suits small community or news sites that want a simple, secure system with built-in features. For most business websites and blogs, WordPress has more themes, plugins and support; for portals with detailed permissions, consider Joomla.
Install Geeklog step by step
1. Log into your cPanel account.
2. In the Software section, open Softaculous Apps Installer.

3. You will be redirected to the Softaculous Panel.
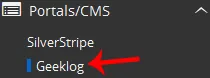
4. On the left sidebar, find the Portal/CMS category. Click on this followed by a click on the Geeklog that will appear under this category.
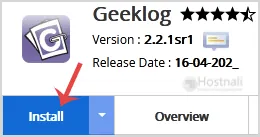
5. Click on the Install button.
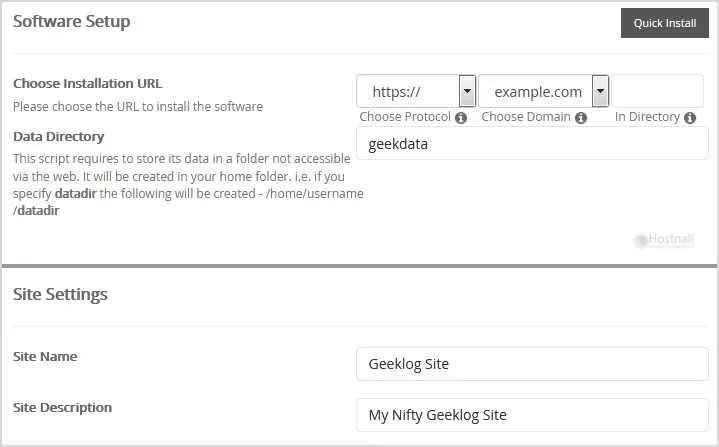
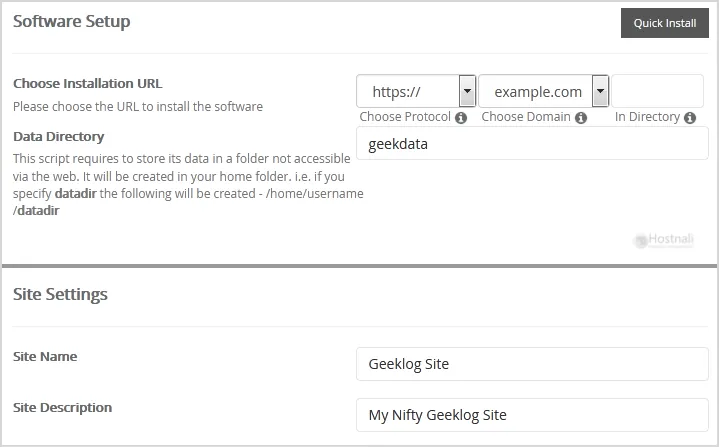
6. You then have to fill the mandatory fields under the Software Setup field:
- Choose Installation URL: Choose the appropriate protocol/domain. Inside the “In Directory” field, should you want to install this in a directory, i.e., hostnali.co.ke/directory, enter the directory name. Otherwise, leave it blank to install in your main domain, i.e., hostnali.co.ke
- Data Directory: Leave this as it is.
7. Under Site Settings field:
- Site Name: Fill in the name of your site, i.e Geeklog.
- Site Description: Site Description.
8. Under the Admin Account field, fill in the information following this guide:
- Admin Username: Your new Geeklog username (for security reason do not use the Administrator or the Admin username.)
- Admin Password: Use a strong password.
- Admin Email: Your e-mail address.
- No-Reply Email: Your no-reply email address.
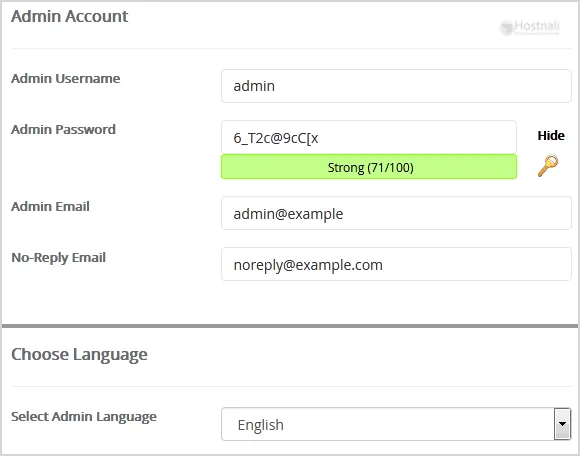
Note: You need to remember the username and the password because you will need these login details to access the admin area of your Geeklog Website.
9. Under the Choose Language field, fill in the information following this guide:
- Select Admin Language: You can choose the admin language of your Geeklog. The default admin language of Geeklog is English.
10. Advanced Options: Leave this as default unless you really want to alter the database name or configure automated backups. Please kindly keep in mind that frequent backups eat up your disk space.
Finally, scroll down to the end of the page and click on the Install button.
After installing
- Log in as the administrator and open the Admin panel.
- Configuration: set the site name, slogan, time zone and email settings.
- Delete or rename the install folder if Softaculous hasn’t already removed it.
- Review user and comment settings: require approval for new users and comments to keep spam out.
- Install plugins you need, such as polls, calendar or static pages, from the plugin manager.
Keeping it secure
- Use a strong administrator password and a username other than “admin”.
- Keep Geeklog and its plugins updated through Softaculous; back up first.
- Daily server backups are included with every Hostnali plan.
Frequently asked questions
Is Geeklog free?
Yes. Geeklog is open source and free to use.
Can I move from Geeklog to WordPress later?
Yes, though it takes some work. Export your articles and import them into WordPress, or ask our team to help plan the move.