 KES
 NGN - Nigeria
 ZAR - South Africa
 USD - International

Plesk is a web hosting control panel that lets you manage websites, email, databases, DNS and SSL on your own server through a browser. This guide shows how to install it on a Linux VPS with the official one-click installer, then how to set it up securely.
This guide was first written for Plesk Onyx on CentOS. Plesk Onyx is the older name of what is now simply called Plesk, and CentOS 7 and 8 have reached end of life, so for a new server choose a current, supported system such as AlmaLinux, Rocky Linux or Ubuntu LTS. The installation steps are the same.
Requirements
| Requirement | Recommended |
|---|---|
| Server | A fresh VPS or dedicated server with nothing else installed |
| Operating system | A Plesk-supported release of AlmaLinux, Rocky Linux, Ubuntu LTS or Debian |
| Memory | 2 GB RAM minimum; 4 GB or more for several websites |
| Disk | 20 GB free or more, depending on your sites and email |
| Access | Root SSH access |
| Hostname | A fully qualified hostname, such as server.yourdomain.com, pointing to the server’s IP |
| Licence | A Plesk licence, or the free trial to start |
Tip: on Hostnali VPS plans you can add a Plesk licence at checkout, or choose cPanel instead with a cPanel VPS.
Step 1: connect and set the hostname
Log in to the server over SSH as root, update the system, and set the hostname:
hostnamectl set-hostname server.yourdomain.comCreate an A record for that hostname pointing to the server’s IP address.
Step 2: run the one-click installer
sh <(curl https://autoinstall.plesk.com/one-click-installer || wget -O - https://autoinstall.plesk.com/one-click-installer)The installation takes about 20–30 minutes. If it shows a hostname warning, let it continue; Plesk usually explains how to fix it afterwards.
Step 3: open the firewall ports
Plesk’s panel runs on port 8443 (https). Make sure your firewall allows it, along with the ports for the services you’ll use:
| Port | Service |
|---|---|
| 8443 | Plesk panel |
| 80, 443 | Websites (http, https) |
| 25, 465, 587 | Sending email (SMTP) |
| 993, 995 | Receiving email (IMAPS, POP3S) |
| 21 | FTP (only if you use it) |
| 22 | SSH |
Step 4: first login and setup
Once Plesk is installed, it will display a congratulations message with your Plesk control panel URL.
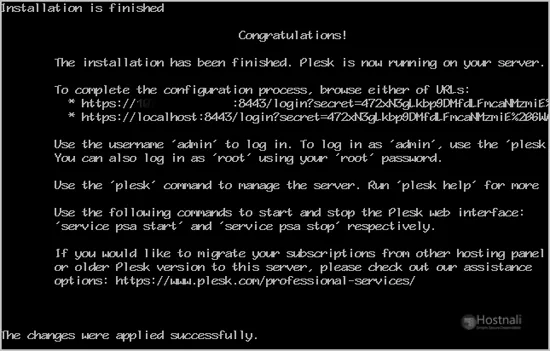
Copy the full URL provided by Plesk and paste it into the browser. If the URL doesn’t work, you will need to open a port in your firewall. You can check it by disabling the firewall and then accessing the URL. If it starts working, it means you need to open a Plesk port in the firewall.
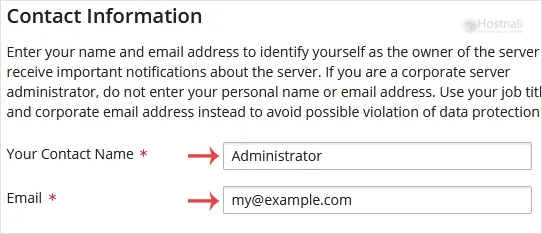
Step 2: If prompted for accepting cookies, acknowledge it, and enter your name and email address in Contact Information.
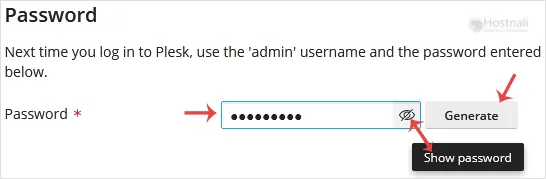
Step 3: Scroll down to the bottom of the page and under the password field, enter the password or generate a new password but make sure that you stored it in a safe place.
Step 4: Under Select your license type, should you have a license key, enter your Plesk Onyx license key or use a trial license by choosing Proceed with a full-featured trial license.
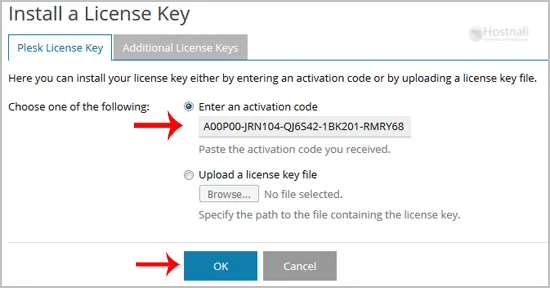
Final Step: Scroll down to the end of the page, read and accept the End-User License Agreement and then click on the Enter Plesk button.

Congratulations, you have successfully installed Plesk Onyx. Now you can access your Plesk administrator area using root login details or with the admin user name with the password you set in Step 3.
Secure your new Plesk server
- Use the Plesk URL with your hostname and issue a free SSL certificate for the panel (Tools & Settings → SSL/TLS Certificates).
- Turn on two-factor authentication for the admin account.
- Keep the system updated: enable automatic Plesk and system updates.
- Enable Fail2Ban (Tools & Settings → IP Address Banning) to block brute-force logins.
- Set up backups to remote storage, such as a storage box. VPS plans don’t include backups unless you add them.
- Change the SSH port or use keys, and disable password logins for root.
Plesk or cPanel?
Both are mature control panels. Plesk runs on Linux and Windows and has a clean interface; cPanel is the most common panel on Linux hosting and the one most hosting customers know. If you’d rather not manage the server at all, managed VPS or shared web hosting with cPanel may suit you better.
Frequently asked questions
Is Plesk free?
Plesk needs a licence; a free trial is available. You can also buy a licence from our software licenses page or add one to a VPS at checkout.
Can I still install Plesk on CentOS 7?
CentOS 7 has reached end of life and no longer gets security updates. Use a supported system such as AlmaLinux or Ubuntu LTS instead.
Can Hostnali install Plesk for me?
Yes. Order a VPS with the Plesk option, or ask our team about our managed service.