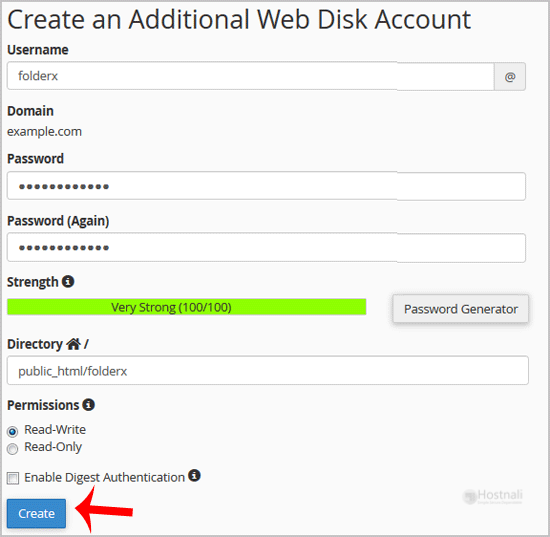
In this tutorial, I will show you How to Create an Additional Web Disk Account in cPanel. We will learn to create an additional Webdisk account to access a specific directory on your cPanel account for security purposes.
1. Log into your cPanel account. (e.g., www.hostnali.co.ke/cPanel )
2. Under the Files section, click Web Disk icon.
3. Under Create an Additional Web Disk Account, enter the information/details of the new Webdisk account you are creating.
Username: folderQ
Password: Specify a password or use the Password Generator to generate a random one.
Directory: If you leave it blank, it will grant access to the entire directory. To allow access to one a specific folder, specify the folder location, i.e public_html/folderQ (this user will only have access to /folderQ).
Permissions: Pick your option.
Note: Bear in mind that if you are using the Windows Operating system and the server does not have an SSL certificate, you will have to Enable Digest Authentication, and allow port 2078 in your computer’s firewall.
4. You can then click the Create button, and your new Webdisk additional account will be created.
